Monday, July 24, 2023

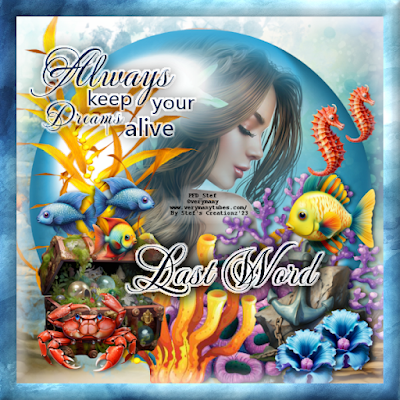
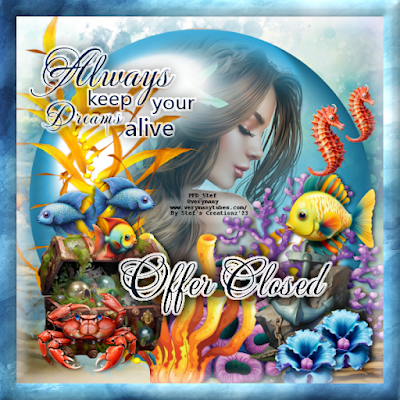
 FTU Always Keep Your Dreams Alive Banner Set Tutorial


Written July 24,2023

This tut is intended for those that have a working knowledge of PSP 

This tutorial was written in PSP X but can be done in any version.

My tutorials are only meant as a guide , if u wish to use a different 

tube or change the colors etc , then please feel free to do so.I love to see what all others can create with my stuff.

Supplies Needed:

Font of Choice ,I am using Meaculpa

U can get it Here... 

Tube of your choice - I am using the beautiful artwork of "Verymany"

You need a license to use her work, please do not use her work without a proper license.. 

U can purchase it Here

Scrap Kit "Octopus Queen" by My Tagging Addiction

You can get it Here

You can check out the rest of her blog Here! 

Mask "110" by Janeane

You can get it Here! 

You can check out the rest of The blog Here! 

Word Art is mine Right click and save


Drop Shadow (this is the drop shadow used throughout tutorial

V = 1

H = 4

Opacity =70

Blur =10.00

Color = Black

Let's Get Started!!!

We will be making a Banner Set so you will need to make a Banner Tag and a

Profile Tag. We will start on the Profile Tag first..

New Canvas 800 x 800 Transparent

New Raster Layer , select all, copy & paste paper 8 into selection, Deselect.

New Raster Layer , select all, copy & paste paper 4 into selection, apply ,mask, merge group, resize 110%.

Copy & paste Element 49, resize 60%

Copy & paste tube, resize 50%, move layer down, highlight top layer (circle layer)

with selection tool set to Eclipse, select circle, invert, now back on tube layer

hit delete, now with eraser ,erase any parts that are left outside of the circle.

Copy & paste , resize (if indicated) Drop shadow and place the following elements.

20 - Resize 40%

19 - Resize 40$ , mirror

3  - erase some

7  - place 

14 - Resize 20%, duplicate , mirror

25 - Resize 15%

17 - Resize 20% 

16 - Resize 20%

34 - Resize 20% ,duplicate ,place to liking

Copy & paste Word  Art , resize as needed /to liking and place.

Now go to Banner Canvas

New Canvas 620 x 230 Transparent

Select all and Copy & paste paper 8 into selection and deselect.

Now go to Profile Tag so we can copy & paste onto the Banner Tag.

Highlight Mask Layer, Copy & paste onto the banner tag., place 

X out of Mask and background layer, then copy merged the rest and paste onto Banner Canvas and place to liking.

Now for the frame layer, go to top layer, add new raster layer ,selections, Modify ,contract by 10,invert and copy * paste paper 4 into selection,

keep selected and go inner bevel to the following settings,

now add Glow with the following settings.


Copy & paste Word Art , resize as needed /to liking and place.

Add copyright and merge visible and save as a PNG.


Now back to Profile Tag resize 75%, All Layers Checked or to 600 x 600 

now for the frame layer, go to top layer

add new raster layer ,selections ,Modify ,contract by 20,invert and copy & paste

paper 4 into selection, keep selected and go inner bevel & glow same settings as above,.

Add copyright and merge visible ,and save as a PNG.

I always resize mine before adding copyright to keep it from being blurry.

Please remember to add all proper © copyright info on both tags.

Add your name...Set background to color to #1a3c64 type name,

Inner Bevel & Glow with the same settings as above,

Save as PNG file...

Hope u enjoyed my tutorial

I would love to see your results, Please post them here or 

u can email them to Here ! with subject 

line "Tut Results"!!! 

Hugs 

Stef 


Here are some snags


Friday, July 21, 2023

FTU Believe In Your Beauty Tutorial & Snags

 FTU Believe In Your Beauty 


Written July 21, 2023

This tut is intended for those that have a working knowledge of PSP 

This tutorial was written in PSP X but can be done in any version.

My tutorials are only meant as a guide , if u wish to use a different 

tube or change the colors etc ,  then please feel free to do so.I love to see what all others can create with my stuff.

Supplies Needed:

Font of Choice , I am using Lackluster

U can get it Here...

Tube of your choice - I am using the beautiful artwork of "Verymany" Streampunk 43

You need a license to use her work, please do not use her work without a proper license.. 

U can purchase it Here!

You can check out the rest of her blog Here! 

Scrapkit "Purple And Blue Steampunk " by My Tagging Addiction

You can get it Here!

You can check out the rest of her blog Here! 

Mask "486" by Izombie 

You can get it Here!

You can check out the rest of her blog Here!

Word Art "Believe In Your Beauty " by Riet

You can get it Here! 

You can check out the rest of her blog Here! 

Drop Shadow (this is the drop shadow used throughout tutorial)

V = 1

H = 4

Opacity = 70

Blur = 10.00

Color = Black


Let's Get Started!!!

We will be making a Banner Set so you will need to make a Banner Tag and a Profile Tag. We will start on the Profile Tag first..

New Canvas 800 x 800 Transparent

New Raster Layer , select all, copy & paste paper 6 into selection, deselect.

New Raster Layer , select all, copy & paste paper 4 into selection , apply mask, merge group resize 130% or to liking.

Copy & paste Frame 2, resize 55%, with my magic wand , selections > Modify> Expand by 5,

New Raster Layer , select all, copy & paste paper 3 into selection, deselect. DS frame.

Copy & paste the following elements resize ,place and drop shadow.

Element 5 - 110% Move below frame layer

Element 6 - 35%  

Element 39 -35% 

Element 10 Move below Element 5 layer

Element 15 -35%

Element 2 - 30%

Element 61- 50%

Element 36 -30% Rotate 15 Right

Element 28 -30%

Element 12 -30%

Element 3 -25%

Element 8 -50%  Rotate 15 Left

Copy & Paste Tube, resize to liking , place & drop shadow ,if using the same tube as me, erase some of the bottom of the tube.

Now to add the Word Art, Copy & paste, erase the credit ,resize to liking    , add glow with the following settings,  5, 100, Medium color #ff80ff

High Pass Sharpen > Adjust > Sharpness >

High Pass Sharpen with the following settings 10,70 Hard Light

Twice.

Now go to Banner Canvas

New Canvas 620 x 230 Transparent

Select all and Copy & paste paper 6 into selection and deselect.

Now go to Profile Tag so we can copy & paste onto the Banner Tag.

Highlight the mask layer , copy & paste it onto to banner tag.

Resize 75%, place to liking, I moved mine down some.

Back to profile tag ,X out of tube layer, mask and background layers, then copy merged the rest and paste as new layer onto Banner Canvas resize and place to liking, I resize mine 75% ,place then copy & paste tube layer, resize & place to liking, 

Copy & paste the Word Art  from Profile Tag , resize to liking.

add copyright on Banner layer, now for the frame layer, go to top layer add new raster layer ,selections, Modify ,contract by 10,invert and copy * paste paper 3 into selection, keep selected and go inner bevel to the following settings,


now add Glow with the following settings.


Merge visible 

Add copyright and merge visible and save as a PNG.


Now back to Profile Tag 

now for the frame layer, go to top layer

add new raster layer ,selections, Modify ,contract by 20,invert and copy * paste paper 3 into selection, keep selected and go inner bevel & glow same settings as above,.

Resize all layers 75% or to 600 x 600. Add copyright and merge visible ,

and save as a PNG.I always resize mine before adding 

copyright to keep it from being blurry.

Please remember to add all proper © copyright info on both tags.

Add ur name...Set background to color ,gradient or pattern of choice ,type name ,add DS and add glow...

Save as PNG file...

Hope u enjoyed my tutorial

I would love to see your results, Please post them here or 

u can email them to Here  ! with subject 

line "Tut Results"!!! 

Hugs 

Stef 


Here are some snags to go with the tutorial .


Tuesday, July 18, 2023

FTU Be Free Under The Sea Banner Set Tutorial and Snags

FTU Be Free Under The Sea Banner Set Tutorial


Written July 18, 2023

This tut is intended for those that have a working knowledge of PSP 

This tutorial was written in PSP X but can be done in any version.

My tutorials are only meant as a guide , if u wish to use a different 

tube or change the colors etc , then please feel free to do so. I love to see what all others can create with my stuff.

Supplies Needed:

Font of Choice ,I am using Summer Splash

U can get it Here... 

Tube of your choice - I am using the beautiful artwork of "My Tagging Addiction" Mermaid 19

This is a Free To Use Tube so You do not need A license to use her work, But please do not use her work without a proper copyright.. 

U can Get it Here! 

Check out the rest of her site Here! 

Scrap Kit "Maritime" by Mizteeques

You can get it Here

Mask "1205"  by Lori's Psps Graphics 


you can get it Here

Check out the rest of her blog Here

Word Art "Be Free Under The Sea" by KimberlyM


You can get it Here

You can check out the rest of the blog Here

Drop Shadow (this is the drop shadow used throughout tutorial)

V = 1

H = 5

Opacity = 70

Blur = 10.00

Color = Black


Let's Get Started!!!

We will be making a Banner Set so you will need to make a Banner Tag and a Profile Tag. We will start on the Profile Tag first..

New Canvas 800 x 800 Transparent

Open Mask , minus down 

New Raster Layer, Selections >Select all, copy & paste paper 6 into selection, apply mask, 

(layers , New Mask Layer, go to From Image , find mask, click apply,) merge group.

Copy & paste Element 8, resize 80%, rotate 15 left.

With magic wand, click inside frame, selections> Modify> Expand by 5, New raster layer,

move this layer below frame layer, copy & paste paper 2 into selection, invert, delete. deselect. Add DS to frame.

Copy & paste element 1, resize 25%, move to top left of frame, add DS, Now copy & paste

element 27, resize 25%, place in center of blue flower, add DS, merge layer down.

Copy & paste element 21 , resize 25% , move to bottom left, DS, now copy & paste element

26, resize 25%, place in middle of yellow flower, DS, merge layer down, Now duplicate 

bottom yellow flower, resize 80%, place up top under the top blue flower, now duplicate

top blue flower, resize 80% , place by yellow flower that you just done, now duplicate

smaller yellow flower and place,(See my tag for placement) then duplicate small blue flower and place. the merge these flower layers.

Copy & paste element 23, place on right side of frame , Add DS.

Copy & paste tube, resize to liking , place , add 

Copy & paste the following elements resize, place and DS

Element 6 , 3, 10 

Copy & paste word art, erase credit and shell, resize to liking, add Glow 5,100, medium color #163a48

DS, Adjust >High Pass Sharpen 10, 70, Hard Light.

New raster layer, selections> Select all, copy & paste paper 3 into selection, deselect, move this layer to the bottom.


Now go to Banner Canvas

New Canvas 620 x 230 Transparent

Select all and Copy & paste paper 3 into selection and deselect.

Now go to Profile Tag so we can copy & paste onto the Banner Tag.

Highlight mask layer, copy mask layer and then go to banner tag and paste 

X out of mask layer ,word art layer and background layer, then copy merged the rest 

and paste onto Banner Canvas and place to liking, then copy & paste word art layer, place to liking, add copyright on Banner layer, now for the frame layer, go to top layer

add new raster layer ,selections, Modify ,contract by 10,invert and copy * paste paper 5 into selection, keep selected and go inner bevel to the following settings,


now add Glow with the following settings.


Add copyright and merge visible and save as a PNG.


Now back to Profile Tag 

now for the frame layer, go to top layer

add new raster layer ,selections, Modify ,contract by 20,invert and copy * paste

paper 5 into selection, keep selected and go inner bevel & glow same settings as above,.

Resize all layers 75% or to 600 x 600. Add copyright and merge visible ,and save as a PNG.I always resize mine before adding 

copyright to keep it from being blurry.

Please remember to add all proper © copyright info on both tags.

Add your name...Set background to color #cef2ea

type name ,add glow... 5, 100, #163a48 Medium

add DS

Save as PNG file...

Hope u enjoyed my tutorial

I would love to see your results, Please post them here or 

u can email them to Here  with subject 

line "Tut Results"!!! 

Hugs 

Stef 


Now here are some snags